Kids Camp Quilt 2014

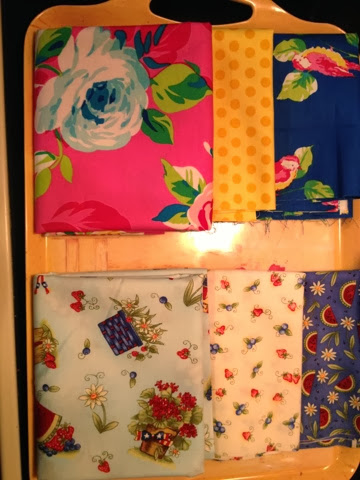
What could be better for a snowy or rainy day than snuggling up under a quilt you can be proud of because you made it yourself? If you take a rainy summer's day to go to your local quilt shop and select fabric with a close relative or friend of the family, please print these directions out so that you know what needs to be purchased to make your very first quilt!
Kids Camp Quilt
Finished lap quilt will be approximately 40” x 59.5”
11 – 6” x width of fabric strips, pre-cut
1 – 45” x 60” piece of batting of your choice (I suggest
80/20)
1 and 3/4 yards of backing (cotton or flannel)
1 - 200 m bright colored
thread for topstitching decorative stitches (make one bobbin)
2 – 400 m neutral-colored construction thread (100% cotton
in 40 weight) (wind two bobbins)
Walking foot – optional
¼” quilting foot – optional
Tools:
6” x 24” ruler
Large 12” x 12” or larger square ruler (for squaring up
corners)
Clover marking chalk
Fabric scissors
Sewing machine in working order
Iron and ironing board
Designated work space (table or floor)
About 24 Pins in a pin cushion
A bodkin or “That Purple Thang” for corners
Instructions
Step 1.
Arrange your
eleven 6” fabric strips into sewing order.
First on top, last on bottom.
Make sure you like the layout before you sew.
Step 2.
Marking. Take the batting and mark a line with chalk
5.5” along one ‘short’ end. This will be
the top of the quilt where you will begin sewing.

Notice that the chalk line is marked along one short
side. This will become the “Top” of
your quilt. A blue Clover chalk made for
quilting works best on white batting. If
your batting is black, you could choose a white or yellow chalk.
Using an 80% cotton/20% polyester batting will keep your
quilt from shrinking too much.

Step 3. Pinning. Lay your first fabric strip face down along the sewing line that you marked with chalk. You should pin using at least eight pins so that the fabric doesn’t separate from the batting when you move over to the sewing machine. Pins are SHARP, so be careful! (Keep in mind that pins kept in the pin cushion ensures they won’t be on the floor and possibly stuck into your foot.) Pin heads tend to get stuck into the batting, so it’s best to pin so that the pin heads are on the smooth, cotton fabric strips.

Step 4.
Dealing with bulk. When you carry the batting and strip of
fabric over to the sewing machine from where you pinned it together on the
table or ironing board, slide the batting and fabric gently under the needle;
being careful that you do not catch the batting in the presser foot or on the
needle. Place the edge of your presser
foot onto the edge of the fabric where it was pinned to the marked chalk
line. You will sew a straight line along
the edge of the fabric. (Sew as straight
as possible. It’s OK if your line waves
a little bit, but if it waves a lot, then stop and ask the teacher for
help. The stitch ripper can be very
helpful in this situation. Sewing takes
practice and patience. You will improve with
time.)

Step 5. Pressing
is a very important part of sewing. Just
like you need thread, fabric and scissors to sew, you need an iron and ironing
board. When fabric is smoothed out and
there are no wrinkles, your entire project will look much more
professional. It is important to use the
cotton setting. I prefer no water in my
iron; instead, I use spray starch.

Step 6. Set the stitches by pressing down onto the stitch line (picture above), then Turn the fabric over so it’s facing up, and press the hot (be careful!) iron across the fabric so that it is as smooth as possible (picture below).

Step 7. Joining the rest of the strips onto the
batting.
This process requires pinning. Pin the next strip on to the edge of the
previously sewn strip right sides together and continue sewing in a straight line, pressing open
with your hot iron and then pinning on the next strip. Continue in this way until all eleven strips cover
the entire batting.


Step 8.
Managing bulk. You will notice that when you have applied
five of the eleven strips, it is getting more and more challenging to manage
the bulk underneath the “arm” or space to the right of the needle on your
machine. This is easy to manage,
however! Just roll up your quilt like a
hot dog to keep control.
You can also roll up the batting to the right of the need to
help keep control. Always STOP before a
pin. Make sure your needle is DOWN, then
remove the pin and continue sewing. I
keep a pin cushion nearby so that I don’t step on any pins that might fall onto
the floor!

 |
| Hot dog! You can roll up your quilt top to the right of the needle to help manage bulk. |


Once you get to the sixth strip, you will want to turn your quilt around the other
direction so you don’t have so much bulk to the right of the needle.
Step 10.
This picture below shows
that five strips have been sewn on to the batting. Time to change direction!

Step 11. Sew on the eleventh strip – the final
one. It is alright if there’s still a little
bit of batting to the right that remains uncovered because we’re going to sew
all around the top and then trim it. Please DO NOT use rotary cutters without the
aid of an adult. An adult MUST help you
with trimming the quilt top.

Step 12. ADULT ASSISTANTS: Square up the quilt top using rotary cutters
and a large square ruler. If you are
under 18, please do not attempt this yourself.
This picture is for illustration only.


Step 13. While your top is being trimmed by an adult, you will iron out any wrinkles from your backing fabric. The fabric must be smooth with no wrinkles before attaching it (right sides together) to your trimmed quilt top.
 |
| (Henny Penny holds all my pins so nicely! For some reason, she likes to hang around upside down...) |
Step 14. Pin the backing fabric face down onto the
right side of the quilt top fabrics. (The
batting should be on the bottom.) You
will use many pins to secure each side.
Be careful not to poke yourself!
It’s alright to ask for help, too.
Notice the picture below shows an opening. We will sew almost all the way around the
quilt rectangle, but we will leave an 8” opening. When you are pinning, be sure to leave one
eight inch space that will not be sewn together. This opening will allow us to turn our quilt
right side out, so it’s very important!
 |
| Be sure to leave an 8"-10" opening on one side so you can turn your quilt right side out! |
 |
| Trim all four corners being careful not to cut through the stitching. |
Step 15.
(Below.)This is called a bodkin. Another name for it is “That Purple Thang” by
Lynn Graves. AFTER you have sewn around the entire
rectangle to secure the front, batting and backing together AND you have
left an eight inch opening, you will trim
all four points with a scissors (being careful to not trim away the
stitches that secure your quilt together!) away, then you can use this handy
bodkin to help you gently poke out
the corners, so you get a beautiful, professional look.
Once the quilt has been turned, pin the opening together
(tucking the fabrics inside) and stitch all the way around the quilt about ¼”
away from the edge (above). The inside right
edge of the foot is a good indicator of what to follow when stitching.

Step 16. Top stitching. You will now change your thread to a
decorative thread color. You can use one
color in the bobbin and a different color in the top if you’d like. You will sew using one (or many) of the S1
stitches (decorative stitches). Which colors and which stitches you use are
up to you, but please keep in mind how much time we have remaining in the
class. The quilt back must be secured to
the quilt front and this will happen when you stitch through all three
layers. It’s called “top stitching”. Some people even add buttons or ribbons! This is something you could do at home, if
you like.
This time, stitching will follow the center of the
foot. Please look carefully at the
picture below. Try your best to keep the
stitches centered along the lines between the different fabric strips. Sew on each line from edge to edge.

Hot dog! Roll up your quilt to help manage the bulk and weight so you can sew in a straight line without accidentally sewing over top a different part of your quilt. Quilting gloves can make this an easier job for your hands. They have ‘sticky’ fingers and grip the fabric nicely.

Step 17. Enjoy! It’s traditional to sleep under the quilt you’ve made before giving it to someone else. You may like it so much, though, that you will want to keep it! You can always make another one for a friend. Can you imagine their happy surprise?

Please leave comments and photos of the quilt you sew below in the comment section - I can't wait to view your creations and I'm sure my readers/followers feel the same!
All the Best,