Hello! I'm
@
and....
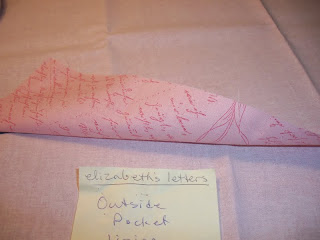
It's TIME! Time for the long-awaited Elizabeth's Letters fabrics made into "My Favorite Bag" from Kati Cupcake Pattern Co.! I saw this fabulous blog post from Jillily Studio in March and knew I had to make it!!
Please purchase the pattern for $12.95 USD from J&R Vacuum and Sewing.
If you're not located there, you can also obtain the pattern from here.
J&R Vacuum and Sewing will offer the creation of this beautiful purse in a class in August 2011.
More information coming soon about exactly when!
When you attend the class, we have altered the pattern for the Elizabeth's Letters fabrics and will have all those instructions for you, with your fabric pre-cut! This purse requires two and a half yards of double-sided fusible fleece. I chose to use the Floriani brand, which made my bag finish beautifully! It stands up well all on its own and won't tip over or sag. My bag holds it shape, which I love!
For the bottom of the bag, I chose to use fusible Pel-Tex, which created a super-strong bottom. But don't worry, you won't be sewing through two thicknesses of Pel-Tex, so your machine will be just fine!
I've also recycled a piece of Olfa cutting mat for the covered inside bottom. This will save my bag from getting dirty - you know all those M 'n M's that end up melting down at the bottom of your bag eventually!!!
This bag features an optional clutch or diaper wipes case, too and fourteen pockets! Love that!!
This bag will be perfect for toting quilting supplies to classes :-)
Cut out all your pieces of fabric and fusible batting, then use this tutorial
to help you complete your bag, if you wish!
Create the template from the pattern instructions and cut out along edge of the outside pockets fabric.
(I have chosen to use the same fabric for both outside pockets and main body for this tutorial.)
Use the template again along the edge of the fusible batting you've chosen for the outside pockets.
Lay the outside pocket fusible down with the outside pocket fabric placed right side up on top.
After both outside pockets have been fused together with an iron, place the outside pockets fabric with right sides together, pin and sew along curved edge so that you have a quilt sandwich.
Press.
Top stitch along curved edge. I chose to use an elaborate topstitching using pink Guetterman thread.
This stitch is available on the Pfaff quilt expression 4.0 and expression 3.0.
Here you see both outside pockets complete.
Now it's time to prepare the inside pockets. I've chosen to use "Elizabeth's Letters" fabric.
Topstitch along edge.
Press.
This is the main body fabric.
Here I have the main body piece facing right side up on the bottom, the previously completed outside pockets in the center and the larger flowers fabric will become the bottom outside of the bag. Pin along the bottom.
Trim excess batting when necessary.
After sewing together, it will look like this.
Time to mark the quilting lines for the outside pockets. I have chosen two lines for each side, so I will have six outside pockets when the bag is finished.
The Pfaff I'm using has a built-in walking foot called "IDT", but if you don't have that feature on your machine, it would be advisable to put your walking foot on before sewing along your marked outside pockets lines.
Begin sewing at the top of the outside pockets and sew just until the top of the bottom of the bag piece.
Here I've marked three lines for each of the inside pockets because I would like eight inside pockets. You could measure your cell phone, wallet, etc. to customize your bag just for your needs.
To form the bottom of the bag, cut 2 1/2" square from the left and right of each outside bottom piece.
(Trim away excess batting when necessary.)
Fusible Peltex will be used to create the bottom of the bag.
This is quite stiff and will create a bag that will sit up on its own.
Mark 1/4" lines and sew along each line.
It is advisable to purchase an applique pressing sheet to protect your iron from the sticky fusible when ironing.
Once inside pockets are complete, it's time to mark the placement of the metal clasp.
Now it's time to mark the placement of the eight grommets, four for each side. The grommets will be placed on the outside top of the main body.
Use the template that comes with the
Mark four 4" apart.
Place completed straps above your grommet markings on the outside main body pieces.
I left about 3 inches between the straps.
Time for the main body pieces to be sewn together using 1/2" seam allowance. At this point, I switched to a 100/16 needle. My 90/14 had broken.
Your bag is currently totally flat. At this point, it's going to be shaped. The bottom of the bag will be like the bottom of a box.
Here is the bottom of the bag lying flat together.
Time to form the bottom of the bag now that the main body is sewn together.
Take the sides and open them up. The seams will match in the center and produce a box-like shape to the bottom of the bag.
Sew across using 1/2" seam allowance.
After sewing each of the sides "open", this is what the bottom of the bag will look like when you are looking at it upside down.
Shape the bottom of your lining similarly.
Sew the inside pockets lining to the main body and top stitch, then turn as above.
Now push the lining through the hole you left on the inside pocket of the bag.
Pull the main body out of the hole left at the bottom of the inside pockets lining and...
Push the light pink inside pockets lining back down into the main body of the bag.
Like sew.
Make sure the corners are pushed out completely.
Ta-dah! Now time to top stitch.
Top stitch around the top of the bag, under the straps.
Cut away the previously marked grommet holes, leaving 1/4" of fabric that can be stretched to fit. Follow the directions from the box of the grommets. Great tips for installing grommets: http://www.burdastyle.com/techniques/installing-grommets
Do all eight; four on front and four on back.
Make your bow. You can use a serger to make it quicker.
Leave 5-6" on one side in order to turn the fabric. Cut 45 degree angles at the bottom of each side and sew. Snip corners carefully.
Turn the bow right side out and top stitch all the way around once you have hand-sewn the opening shut.
Insert the completed bow into the grommets and tie as you wish.
Time to fill my bag with quilting supplies for my next class!
Notes:
I thought this pattern was very well-written and easy to follow. I plan on sewing more bags to give as gifts to family members. Next time, I will be using a Heat 'n Bond lightweight fusible. The bag won't be as stiff. I'm sure this is a personal preference.
You can purchase this pattern HERE.
There is also a purse-sized, smaller version HERE.
You can see many different "My Favorite Bag" fabric combinations HERE.
If you liked this tutorial, please leave a comment to let me know! I'd love you to give me a follow.
*************
Please join the fun! Add your tute by linking up here:


Wonderful tutorial!
ReplyDeleteWhat a lovely bag... thanks for taking the time (and all the photos) to post such a detailed tutorial!
ReplyDeleteThe bag turned out to be really pretty! I remember you telling me about the fabric several months ago. Great job!
ReplyDeleteI love a good bag! I'll have to check this one out in more detail!
ReplyDeleteThank you so much for your tutorial! I had bought the pattern, was making the bag, and got stuck. Thanks to you, I can continue my project! Thank you! Thank you! Thank you!
ReplyDeleteBest tutorial ever!
ReplyDeleteI had purchased the pattern for a class but your tutorial made the instructions so much clearer! Thanks for your effort. Your bag is beautiful.
ReplyDeleteMy sister and I are just going to start this bag...the tutorial has made some aspects clearer! Thank you.......
ReplyDeleteThank you so much for the tutorial, esp the pics, it has been very helpful in making mine.
ReplyDeleteGreat tutorial. Have you tried to put a zipper in this bag? My daughter wants me to make one for her but would like a zipper. I can not figure out how to do it. Please let me know if you have any suggestions.
ReplyDeleteHello, I had taken a break from blogging, but am working on reviving it. Placing a zipper in a bag like this would not be too difficult. I would add two doubled pieces of fabric 5 inches wide each lined with one piece of iron in stabilizer and attach the zipper between the two pieces, then turn and finish the raw ends and hand sew to each side of the bag.
Deleteyozgat
ReplyDeleteadana
adıyaman
afyon
aksaray
KFHB4
whatsapp görüntülü show
ReplyDeleteücretli.show
SRA
görüntülü.show
ReplyDeletewhatsapp ücretli show
İ5G
Thank You and that i have a nifty offer: Whole House Renovation Checklist Pdf home reno costs
ReplyDelete