Thursday, February 28, 2013

Tips and Men, Part 9

Tips and Men, Part IX

"Binding and a Finish"

Last time I entered a quilt into a quilt show, the judge advised being sure to "fill" my binding.  After researching different types of bindings HERE, I found that leaving a 1/2" of batting and backing to the right of the sewn-on binding strip will give me the binding the adjudicator sought.  
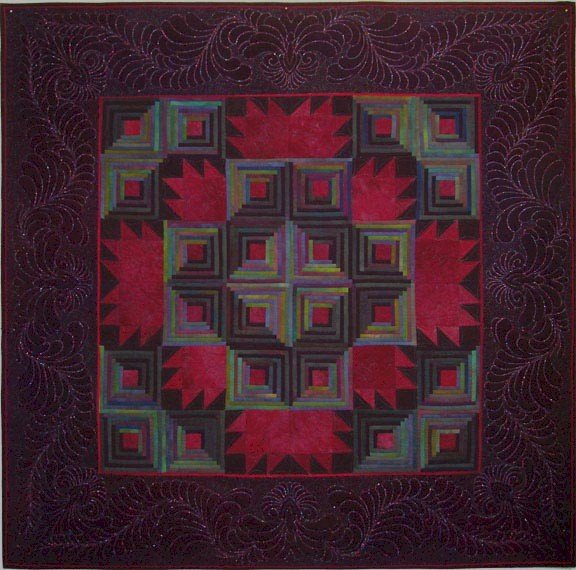
Perhaps this quilt would now win?!?


National Quilting Day is coming up on March 9th, 2013 and I am going to show this quilt :-)  Can't wait!

Attaching the binding with a walking foot


Folding over the binding to the back with 1/2" of material 'filling' the binding


Now time to hand sew with a slip stitch the full length around.

A finished, mitered corner was created by clipping the extra batting and backing off completely at a 45 degree angle so there wouldn't be too much filling.


Now, as tradition dictates, I need to sleep one night under the quilt before giving it to my DC because...


More Tips and Men!  Thanks for following along and leaving your helpful hints :-)  It's been fun!

@


Monday, February 25, 2013

Tips and Men, Part 8

Tips and Men, Part 8

This was one busy weekend for company and for quilting, both!  I got to go to two quilt shops with my sis-in-law who is also a quilter, my Mother got to pick out a new used vehicle and the Tips and Men quilt for my cousin is even closer to being finished - all that's left is to hand sew the binding on!!


This is a King-sized quilt - it's a 'whopper' - quite heavy, indeed!


Here's a template I designed and cut out onto lightweight cardboard.  The Fons & Porter pencil with white lead and a handy-dandy tape measure round out the goodies.


With an 85" space, I'm creating three template markings per 17".


The midpoint of the template marks the 17" spot.


Here I am at work!


The Brother Nouvelle PQ1500S sails through quilt sandwiches at 1500 stitches per minute.


It sure is fun to use!


Flying star borders


I like this photo-it really shows the border nicely.

 Here's a close up of the stitched template.  Sinking thread ends kept me busy for about two hours last night, but it was fun to snuggle up under the quilt while working!


Square up the corners and edges to 1".


Attach the binding, leaving a healthy 10" unstitched at each end, plus a 20" opening.


Stop at a 1/4" from the end 


sew down


Walking foot


Here's a picture of the quilt that I'd hoped to show off the binding, but it was too difficult to photograph due to its fairly monstrous size - the binding only shows at the very bottom - sorry about that!  Once the binding is sewn on, I'll take one last photograph and show you the completed quilt!!


The next quilt has been cut :  10" squares in various 1930s prints featuring kitties.  This one's for me :-)  My sis-in-law and I found this at one of the two quilt shops we frequented this weekend - it'll make for a good memory to use this quilt!

What are you working on this week?
Who are you sewing/quilting for?

@


More "Tips and Men" posts:
Part 7


Thursday, February 21, 2013

Tips and Men, Part 7

Tips and Men, Part 7
-almost finished!!

My DH is great with math, so I challenged him early this morning and he was able to explain/show me that:

with a 85" x 14"w border and wanted five large 10" star templates equally along that length, he explained that I'd need to use a 17" middle for each 10" star template.  So, it'll go like this:


[1,2,3,4,5,6,7,8,9,10,11,12,13,14,15,16,17" and continually all the way across the 85" border each 17"]
                                                                X(this will be the center of each 10"star)  From here, I'll mark another 17"                                               1, 2, 3, 4, 5, 6, 7, 8, 9, 10, 11, 12, 13, 14, 15, 16, 17
                                                                                                                                               X, etc.

Since I wanted five 10" stars along the 85" border, he divided 85" by 5 to come up with 17".  (This is the length of my inside border - there are another 2.25" inches on each end.  What an incredibly large and heavy quilt this is!

I hope that helps explain it, but you know they say a pictures worth 1,000 words, so here's a pic:

85" long x 14" wide

I'll use Fons & Porter mechanical pencil in white to mark my star-shaped 10" template.

 
After figuring out exactly where to place the template, it's time to get marking!
I've been scared off from blue wash-out markers, as they can come back in cold weather and that won't work for this neck of the woods!


Marked and sewn!  Now, nine more to go...


More "Tips and Men" posts:


 Please meet Nouvelle...my new quilting friend...


Brother Nouvelle PQ-1500S and my giant king-sized quilt


It's easy to keep the bobbin thread from being too long


Easy access through the table via a door


Awesome tall shank - very easy to see!


These bobbins go longer than regular bobbins


There are four different feed dog drops - I'm using the third one with the pin tuck.


It's cold here, so I've got to get busy sewing!  My cousin's waiting to warm up after sixteen hour days in the North Dakota oil fields!

Now, for my readers and followers:

If you need inspiration to keep yourself busy this winter, please visit www.everythingetsy.com  for 101 Winter Projects - all free!


Wednesday, February 20, 2013

FREE quilt patterns and more

FREE for my blog followers!


I'm working on my King-sized "Tips and Men" quilt and have purchased a NEW MACHINE for the quilting - it's WONDERFUL!!!  I can't tell you how great it is for the reasonable price - do yourself a big favor and go into your local Brother dealer and test drive this straight-stitch quilting machine!  Brother PQ1500S
Brother PQ 1500S

Basic Featuresback to top
LCD Size (Horizontal x Vertical) inchesNo
Stitch SelectStraight stitch only
Lighting1 Lamp
Number of Needles1
Needle Threading SystemEasy
Thread TensionManual
Adjustable Bobbin Winding SpeedYes
Thread SensorNo
Automatic Thread CutterYes
Quick-Set™ BobbinNo (Vertical)
Full USBNo
Computer Connectivity with Update CapabilityNo
Mouse Capability by USBNo

Sewing Featuresback to top
Bed Area (Depth x Width) inches11.0 x 23.2 (with table)
Work Space (Height & Width) inches5.7 x 8.6
Maximum Sewing Speed (Stitches Per Minute)1,500
Knee LifterYes
Feed DogSpecial to PQ1500S (with Pin-feed)
Back to Beginning KeyNo
Standard Presser Feet Included with Machine7
Built-in Sewing Stitches (Includes Buttonhole Styles)1 (Straight Stitch Only)
Buttonhole StylesNo
Built-in Sewing Lettering FontsNo
Stitch Length7mm
Side FeedingNo
Start/Stop ButtonNo
Speed ControllerNo
Twin Needle Setting KeyNo
Needle Position Key (Up/Down)No
Automatic Height Adjuster™ AHA® FeatureNo
Presser Foot Pressure AdjustmentYes
Presser Foot LevelingNo
Automatic Presser Foot LifterNo
Pivot FunctionNo
Drop Feed/Free MotionYes (4 Steps)
Free Motion Quilting FootNo
Built-in Quilting StitchesNo
Included Quilting FeetYes
TableYes
Specialty Feet IncludedYes (Additional specialty feet may be available. See Optional Accessories)

Carton Contentsback to top
Accessory StorageNo
Carrying CaseSoft cover
Included Accessory FeetGeneral purpose foot, Rolled hem foot, Adjustable zipper foot, Invisible zipper foot, 1/4" foot, Spring action quiliting foot, Walking foot
TableYes
Other Included AccessoriesKnee lifter, accessory kit with needle packet, ballpoint needle, spool cap, fabric separator, feed pin, feed pin changer, metal bobbins (5), seam guide, cleaning brush, screwdrivers (2), spool cushion, power cord and Operation Manual
Foot ControllerYes

Warranty2/6/25 year premium warranty. See premium warranty for details.
UPC Code012502601111
Machine Dimensions (H x W x D)12.6" x 7.9" x 19.3"
Machine Weight24.2 lbs
Shipping Dimensions (H x W x D)15" x 11.8" x 25.2"
Shipping Weight34.8 lbs
UL/CSA ListedYes, 110v
Needle Plate Measurements


Monday, February 18, 2013

Liebster Award!


has nominated me for the 
and has eleven questions for me, which I'm happy to answer for her.

1. Biggest quilt inspiration?
My grandfather sewed many quilts and sleeping under them even to this day helps me remember him.
2. Favorite spot to get away?
I love to retreat to my machine after work, wherever it may be set up.
3. Why do you blog?
Blogging has been a blessing - at first, it was a way to keep track of my new hobby of quilting (2009), but now it's a way to share and learn from others.
4. What is one thing from earlier in your life that you wish was still available today?
Richie Rich comic books!  I just loved Little Dot and Dollar, his side-kicks.
5. Favorite TV show
Sewing with Nancy on PBS.
6. Favorite place to get fabric?
My local quilt shops :-)
7. What are your thoughts on scraps?
Cut 'em up with my AccuQuilt cutter and make them into usable 2.5" and 5" squares or 2.25" or 2.50" strips.  Anything smaller than 2.5" square goes into a bag that I'll use once it fills up to stuff dog beds.
8. Where do most of your quilts end up?
Covering up chilly folks ;-)
9. Favorite time of year?
As a football 'widow', I now love that time of year.  The sound of my machine drowns out the games on TV!
10. What are you most proud of in your life?
My marriage to the most wonderful man on the planet!  ;-)
11. What kind of quilting helper do you have?
My daughter, son and granddaughter all help me with quilting.  My 19 year old helps me select color combinations, my son helps me 'crank' the AccuQuilt Go! Cutter handle and my granddaughter helps me sew straight lines!

The fun parts of the nomination includes
--- Telling 11 things about yourself
--- answer the questions posed to you be the nominator
--- choose other bloggers to nominate (must have under 200 followers)
--- create 11 questions for your nominees
--- once nominated link back to the blogger that nominated you so they can learn more about you.

So, I am nominating a very good quilting buddy of mine, who also has her own etsy shop and has been a tremendous inspiration to me, CeLynn of CeLynn's Sunflower Patch!!

1.  What got you started sewing and quilting?
2.  How long have you been selling items on etsy?
3.  What is the most difficult and challenging quilt you've ever made?
4.  Is there anything that you haven't yet tried as far as patterns go, but would like to make one day?
5.  Have you ever made a quilt to give away to someone?
6.  What do you create besides quilts?
7.  What's your favorite color or color scheme?
8.  Which do you like best:  purses or perfume?
9.  What's your favorite brand of sewing machine?
10.  Where do you purchase most of your sewing and quilting items?
11.  Have you ever purchased something from an etsy shop?

All the Best,
@


Tips and Men, Part 6


The king-sized quilt is sandwiched and about 80% quilted!  I will need to mark the borders, but it has been very quick so far using a large stipple with variegated thread.  

To create the quilt sandwich, I measured the top and then had to purchase 3 more yards of material (for a total of nine) to create the back.  

Instead of the floor, this time I utilized the dining room table with all the leaves in it.  I began pinning down the center, then switched directions to the left and to the right around the around the table until it was completely pinned.  This was much easier than the floor, esp. with my Kwik Klip as assistant.  I hope you'll enjoy the YouTube video of how to use this handy-dandy tool.  (A grapefruit spoon also works well, though!)


After pinning, I trimmed the edges of  the backing and batting to 4" using a 


I used the Sew Slip to cover my machine's sewing surface and sat up higher with the use of my Gypsy Sit-Upon.  This item really helps to keep a person sitting at the right height at the table so that your arms aren't 'flying' while machine quilting.


I picked up a pair of very useful Fons & Porter Machine Quilting Grip Gloves - I can't quilt a large quilt without these babies!  Golden yellow are size large, medium is blue, but I wish they had a size small, maybe in red.  Whenever I purchase winter gloves, I have to shop in the children's section ;-(


Here's the back!  Three pieces of fabrics, 3 yards each, sewn together with a 1/2" seam allowance (I was concerned about strength because all this fabric is quite heavy.)


A close-up of my practice quilt sandwich using 90/14 needle with Sulky variegated thread
The tension on my machine is set to 5.2, but all machines vary.  A looser top tension usually helps with free motion, I find.


Tomorrow, I'll mark the borders and create those.  The binding is already finished and ready to sew on, so it won't be long now until we see a complete finish!!

What are you working on this week?

All the Best,

@


LinkWithin

Related Posts Plugin for WordPress, Blogger...